Recently bought a raspberry pi and opened it with my 2 year old daughter. Although she lost interest quickly, I wanted to do something with it. So thought won't it be cool if I could host my own website through my home. Infact this website is now being run from my own home from a tiny raspberry pi computer sitting near my desk.
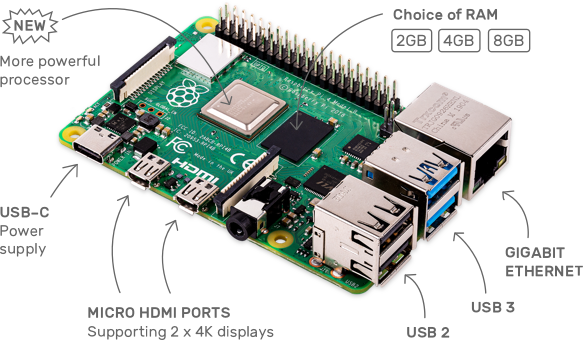 Raspberry PI
I wrote this post as I was figuring out the steps so that I can redo it anytime I need to do this again in the future:
1. Install webserver from rasberry pi
To do this, first boot up rasberry pi and install a server like nginx like this:
sudo apt update
sudo apt install nginx
sudo /etc/init.d/nginx start
I chose nginx to install. You can also install something else like apache.
Navigate to http://localhost or to hostname -I
2. Connect to the internet
In order to make the website available with the external IP, the router must be configured to allow outside traffic on port 80 and port 443(ssl). The setup is entirely dependent on your router, so find instructions for your exact hardware. The basic process will have you connect to the router via it’s IP (usually 192.168.0.1), then setup a forwarding rule for port 80.
3. Enable DNS
Now your raspberry pi is able to take traffic from outside. But people need to know how to hit it. Unfortunately most residential service providers don't give a static IP. So to get around that, I installed a software on Raspberry pi which will allow me to publish my current IP every so often to my domain. I own my domain on Google Domains. So next step is to setup your domain to be dynamic DNS.
- Google Domains allows this and more info is here: https://support.google.com/domains/answer/6147083?hl=en-GB&ref_topic=9018335#zippy=%2Cset-up-a-client-programme-on-your-gateway-host-or-server
- Install a software to publish your dynamic dns using the steps mentioned here: https://samhobbs.co.uk/2015/01/dynamic-dns-ddclient-raspberry-pi-and-ubuntu This is the config you will most likely have:
sudo nano /etc/ddclient.conf

# Configuration file for ddclient generated by debconf
#
# /etc/ddclient.conf
protocol=dyndns2
use=web, web=dyndns
server=domains.google.com
ssl=yes
login=<username>
password='<password>'
deepank.info
Test it using this command:
sudo ddclient -debug -verbose -noquiet
4. Setup https
There are free services available to enable SSL and end to end encryption for your website. Setup SSL on your server by creating a certificate using letsencrypt and also putting it in nginx: https://pimylifeup.com/raspberry-pi-ssl-lets-encrypt/
pi@raspberrypi:~ $ sudo certbot certonly --webroot -w /var/www/html -d deepank.info -d www.deepank.info

sudo nano /etc/nginx/sites-available/default

server {
        listen 80 default_server;
        listen [::]:80 default_server;
        listen 443 ssl;
        server_name deepank.info;
        ssl_certificate /etc/letsencrypt/live/deepank.info/fullchain.pem;
        ssl_certificate_key /etc/letsencrypt/live/deepank.info/privkey.pem;
5. Setup your website
My website is powered by hugo. I enabled the server and setup nginx config to point to my new server like this.
- Install hugo on raspberry pi: https://snapcraft.io/install/hugo/raspbian
- Download my repo from gitlab and do:
$ git submodule init
$ git submodule update
$ hugo --gc --minify
This will get the site built into the public directory. Now we need to point the nginx server to send the traffic over to this. We do this by changing the nginx config like so: https://gideonwolfe.com/posts/sysadmin/hugonginx/
sudo nano /etc/nginx/sites-available/deepank.info
Add the webroot to be the public folder where the website exists.
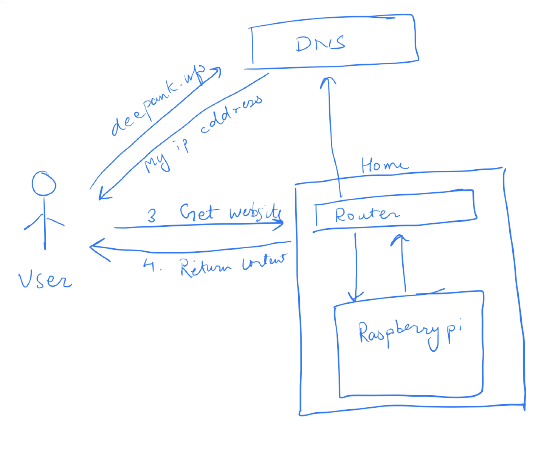 Workflow for hosting on Raspberry PI
Final thoughts
This was a fun 3-4 hour project on a lazy Sunday afternoon which gave me a weird sense of satisfaction even though none of this has any legitimate benefit. If you don't want to go through all this trouble, there are many cloud providers which can host your static websites for free. My other domain has the same exact site hosted through netlify. Those would also allow you continuous deploy and other fancy things.